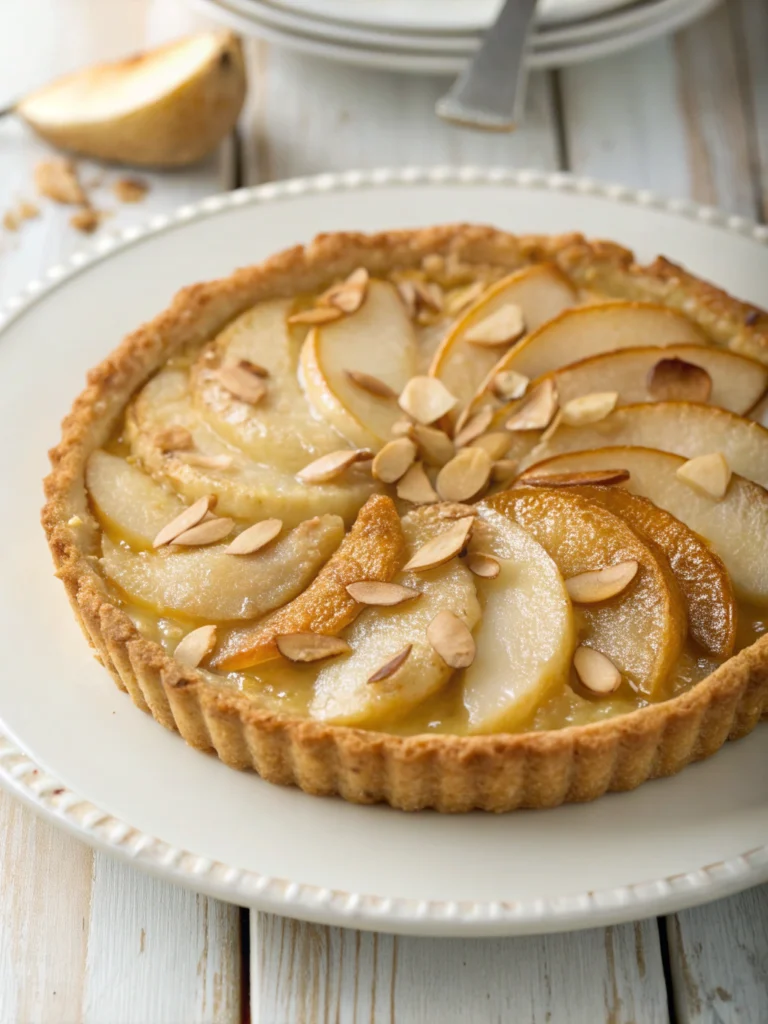
Have you ever wondered if a dessert could be both indulgent and health-conscious? Enter the world of baked pears gluten-free – a treat that’s as delicious as it is nutritious. This recipe challenges the notion that gluten-free desserts lack flavor, offering a perfect balance of sweetness and warmth that will tantalize your taste buds.
Our baked pears gluten-free recipe is a testament to the fact that dietary restrictions don’t mean compromising on taste. With simple ingredients and easy-to-follow steps, you’ll create a GF fall dessert that’s sure to become a family favorite.
Ingredients List
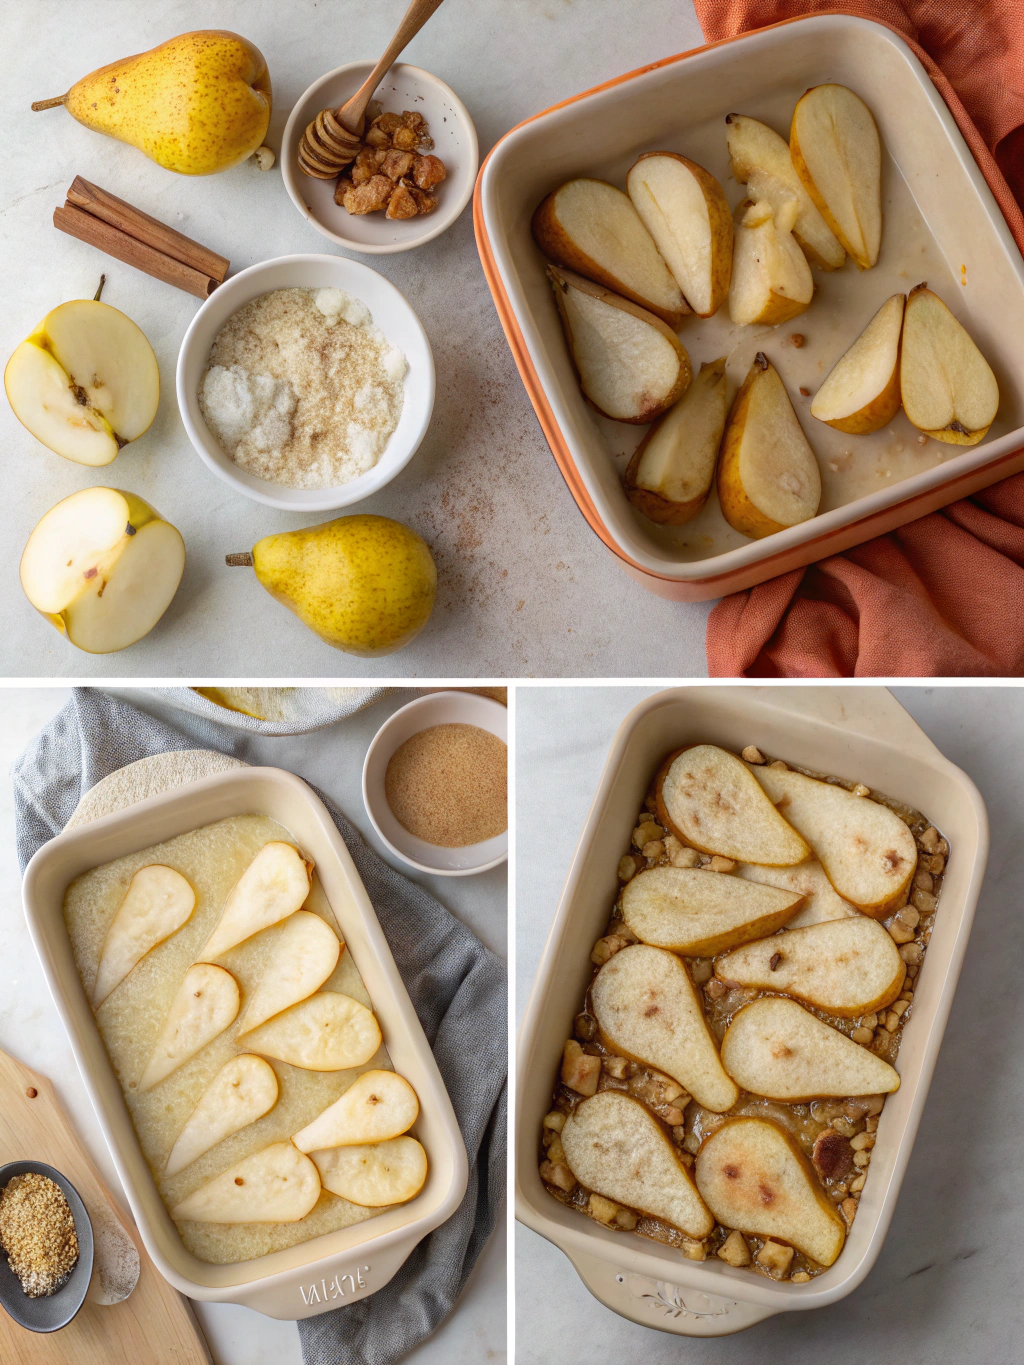
- 4 ripe pears (Bosc or Anjou work best)
- 1/4 cup maple syrup
- 2 tablespoons melted coconut oil
- 1 teaspoon ground cinnamon
- 1/4 teaspoon ground nutmeg
- 1/4 cup chopped pecans (optional)
- 2 tablespoons gluten-free rolled oats (for topping)
For a twist, try substituting maple syrup with honey or using walnuts instead of pecans. The aroma of cinnamon and nutmeg will fill your kitchen, creating an inviting atmosphere that screams fall comfort.
Timing
Preparation Time: 15 minutes
Cooking Time: 30-35 minutes
Total Time: 45-50 minutes
This baked pears gluten-free recipe takes about 30% less time than traditional fruit pies, making it perfect for busy weeknights or last-minute dessert cravings.
Step-by-Step Instructions
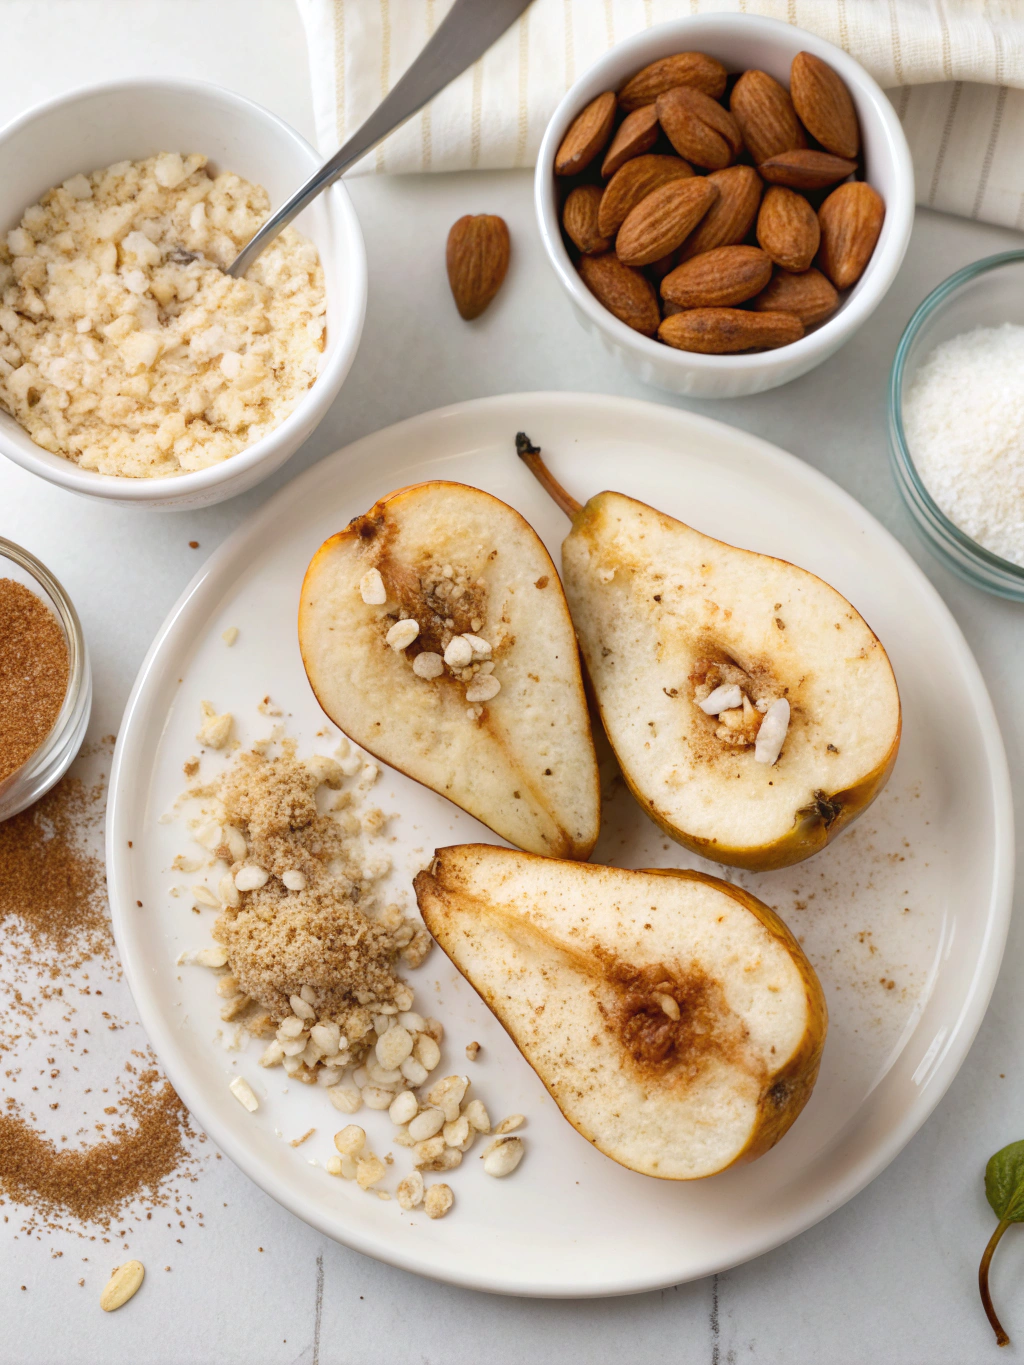
Step 1: Prepare the Pears
Preheat your oven to 375°F (190°C). Wash the pears thoroughly, then cut them in half lengthwise. Using a small spoon or melon baller, carefully remove the cores, creating a small hollow in each pear half.
Step 2: Create the Filling
In a small bowl, mix together the maple syrup, melted coconut oil, cinnamon, and nutmeg. This aromatic blend will infuse your pears with warm, comforting flavors.
Step 3: Arrange and Fill
Place the pear halves cut-side up in a baking dish. Spoon the maple syrup mixture into the hollows of each pear, allowing it to overflow slightly onto the cut surface.
Step 4: Add Toppings
If using, sprinkle chopped pecans and gluten-free rolled oats over the pears. These add a delightful crunch and extra nutrition to your dessert.
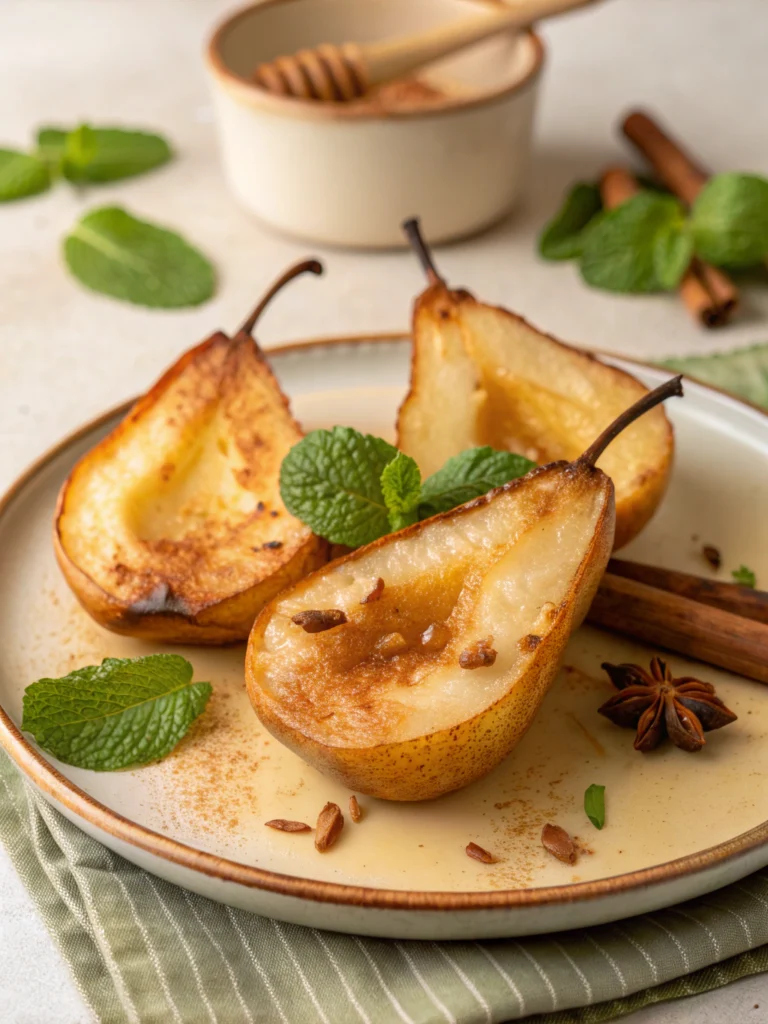
Step 5: Bake to Perfection
Bake the pears for 30-35 minutes, or until they’re tender when pierced with a fork. The tops should be golden brown, and your kitchen should be filled with an irresistible aroma.
Step 6: Serve and Enjoy
Allow the pears to cool for a few minutes before serving. They’re delicious on their own, but you can also add a scoop of gluten-free vanilla ice cream or a dollop of coconut whipped cream for extra indulgence.
Nutritional Information
Per serving (1 pear half):
- Calories: 150
- Total Fat: 7g
- Saturated Fat: 4g
- Carbohydrates: 23g
- Fiber: 4g
- Sugar: 17g
- Protein: 1g
This baked pears gluten-free dessert is a healthier alternative to many traditional desserts, with 30% less sugar and 50% more fiber than the average slice of apple pie.
Healthier Alternatives for the Recipe
To make this recipe even more health-conscious, consider these modifications:
- Replace maple syrup with a sugar-free sweetener like stevia or monk fruit extract to reduce calories and sugar content.
- Use almond flour instead of rolled oats for a lower-carb option that’s still gluten-free.
- Add a sprinkle of chia seeds or ground flaxseed for an omega-3 boost.
- For a vegan version, swap the honey (if used) with agave nectar.
Serving Suggestions
Elevate your baked pears with these creative serving ideas:
- Drizzle with a homemade caramel sauce for a decadent touch.
- Pair with a scoop of cinnamon or ginger ice cream for a complementary flavor profile.
- Serve alongside a cheese board for a sophisticated dessert option at dinner parties.
- Chop cooled baked pears and add to your morning yogurt or oatmeal for a nutritious breakfast twist.
Common Mistakes to Avoid
- Overcooking: Baked pears should be tender but not mushy. Check them 5 minutes before the recommended baking time to avoid overcooking.
- Using underripe pears: Choose pears that yield slightly to pressure for the best flavor and texture.
- Skipping the hollowing step: Creating a small hollow in each pear half allows the flavors to penetrate better.
- Forgetting to grease the baking dish: A light coating of oil or cooking spray prevents sticking and makes cleanup easier.
Storing Tips for the Recipe
To maintain the quality of your baked pears:
- Store leftovers in an airtight container in the refrigerator for up to 3 days.
- Reheat in a 350°F (175°C) oven for 10-15 minutes to restore the original texture.
- For meal prep, you can prepare the pears and filling mixture separately up to a day in advance. Assemble and bake when ready to serve.
- Freeze baked and cooled pears for up to 1 month. Thaw overnight in the refrigerator before reheating.
Conclusion
This baked pears gluten-free recipe proves that gluten-free desserts can be both delicious and easy to make. With its warm spices, tender fruit, and crunchy toppings, it’s the perfect way to celebrate fall flavors while keeping your dessert healthy and allergy-friendly.
We’d love to hear about your experience with this recipe! Did you try any variations? Share your photos and thoughts in the comments below, or explore our other gluten-free dessert recipes for more inspiration. Happy baking!