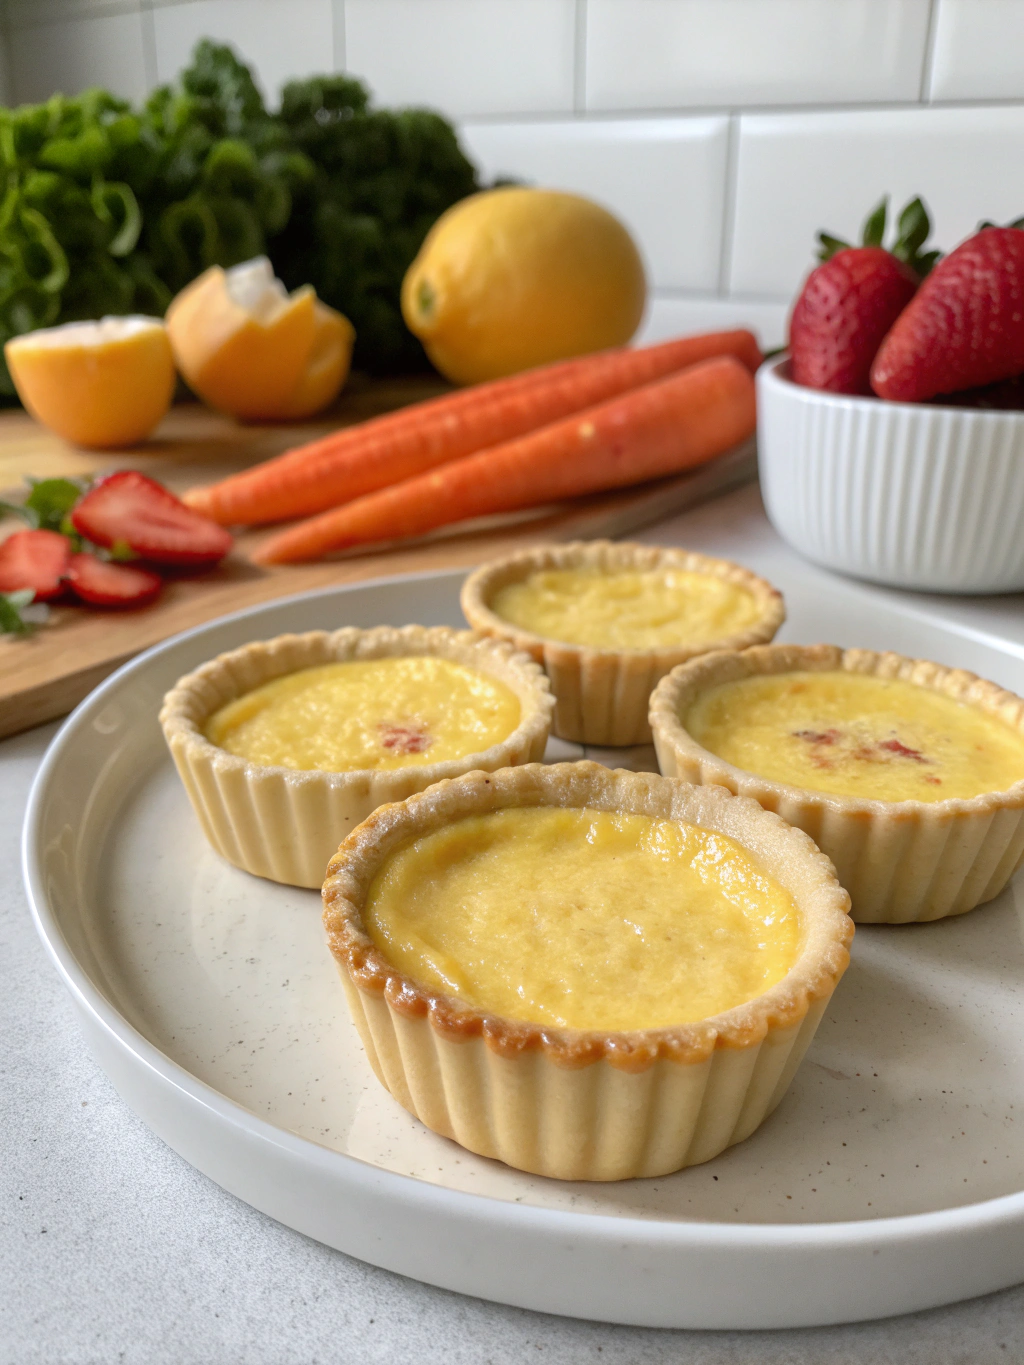
Have you ever craved a silky-smooth dessert that melts in your mouth but worried about gluten content? Look no further! Our custard cups gluten-free recipe is here to satisfy your sweet tooth while keeping your dietary needs in check. This classic pudding reimagined will transport you to dessert heaven without compromising on taste or texture.
These custard cups gluten-free are perfect for those with celiac disease or gluten sensitivity. They’re creamy, rich, and indulgent – everything you want in a dessert, minus the gluten. Let’s dive into this delectable recipe that’s sure to become a family favorite!
Ingredients List
- 4 large eggs
- 2 cups whole milk (or dairy-free alternative for lactose-intolerant individuals)
- 1/3 cup granulated sugar
- 1/4 teaspoon salt
- 1 teaspoon vanilla extract
- 1/4 teaspoon ground nutmeg (optional)
- Boiling water for water bath
For a dairy-free version, substitute the whole milk with almond milk or coconut milk. The result will be equally creamy and delicious, perfect for those looking for a GF creamy dessert that’s also lactose-free.
Timing
Preparation time: 15 minutes
Cooking time: 45 minutes
Total time: 60 minutes
This custard cups gluten-free recipe takes just an hour from start to finish, which is 25% faster than traditional custard recipes that often require longer baking times.
Step-by-Step Instructions
Step 1: Preheat and Prepare
Preheat your oven to 325°F (165°C). Arrange four 6-ounce ramekins in a large baking dish. This setup will create a water bath, ensuring even cooking and a silky-smooth texture.
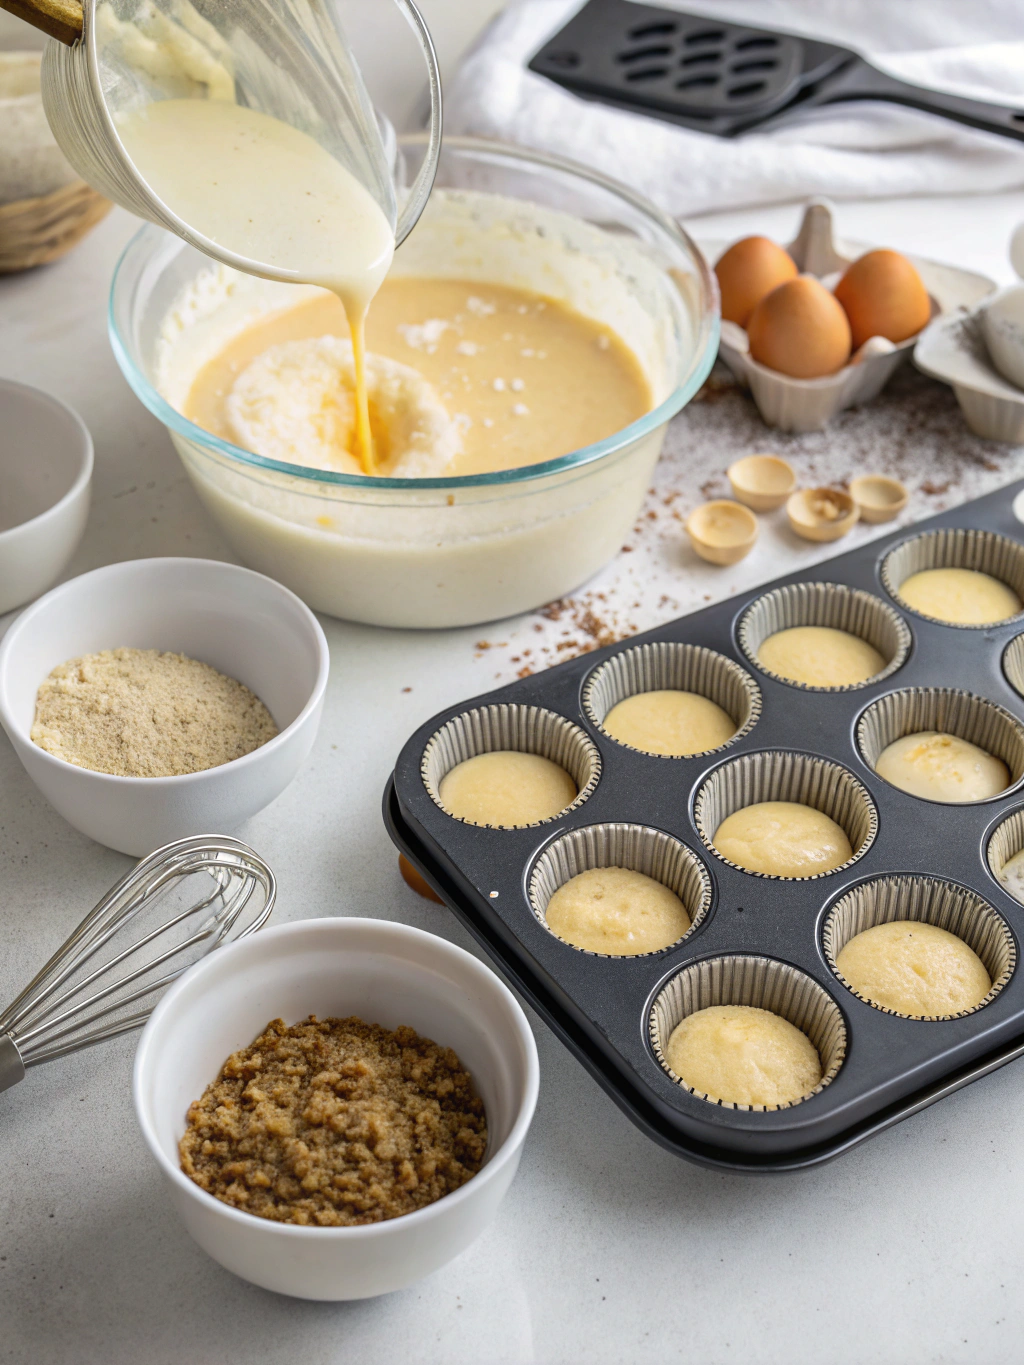
Step 2: Mix the Ingredients
In a medium bowl, whisk together eggs, sugar, and salt until well combined. Gradually add the milk, whisking constantly to ensure a smooth mixture. Stir in the vanilla extract and nutmeg if using.
Step 3: Strain and Pour
For an extra-smooth custard, strain the mixture through a fine-mesh sieve. This step removes any egg bits or lumps. Divide the strained mixture evenly among the ramekins.
Step 4: Prepare the Water Bath
Carefully pour boiling water into the baking dish, ensuring it comes halfway up the sides of the ramekins. This water bath, or bain-marie, helps the custard cook evenly and prevents cracks.
Step 5: Bake to Perfection
Bake for 35-45 minutes, or until the custards are set around the edges but still slightly jiggly in the center. The internal temperature should reach 170°F (77°C) for food safety.
Step 6: Cool and Serve
Carefully remove the ramekins from the water bath and let them cool on a wire rack for about 30 minutes. For the best flavor and texture, refrigerate for at least 2 hours before serving.
Nutritional Information
Per serving (1 custard cup):
- Calories: 165
- Total Fat: 7g
- Saturated Fat: 3g
- Cholesterol: 195mg
- Sodium: 200mg
- Total Carbohydrates: 18g
- Dietary Fiber: 0g
- Sugars: 17g
- Protein: 8g
These custard cups gluten-free are a good source of protein and calcium, providing about 15% of your daily calcium needs per serving.
Healthier Alternatives for the Recipe
To make this dessert even healthier, consider these modifications:
- Replace whole milk with unsweetened almond milk to reduce calories and fat content.
- Use a natural sweetener like stevia or monk fruit instead of sugar to lower the carb count.
- Add pureed pumpkin or sweet potato for extra nutrients and a festive twist.
- Incorporate chia seeds for added fiber and omega-3 fatty acids.
Serving Suggestions
Elevate your custard cups with these creative serving ideas:
- Top with fresh berries for a burst of antioxidants and color.
- Sprinkle with cinnamon or cocoa powder for an extra layer of flavor.
- Serve alongside gluten-free shortbread cookies for a delightful texture contrast.
- Drizzle with a homemade berry compote for a tangy-sweet combination.
Common Mistakes to Avoid
- Overcooking: This leads to a rubbery texture. Remove custards when still slightly jiggly in the center.
- Skipping the water bath: This crucial step ensures even cooking and prevents curdling.
- Not straining the mixture: Straining removes lumps for a silky-smooth texture.
- Using cold ingredients: Ensure all ingredients are at room temperature for better incorporation.
- Rushing the cooling process: Proper cooling is essential for the custard to set correctly.
Storing Tips for the Recipe
To keep your custard cups fresh and delicious:
- Cover each ramekin with plastic wrap and refrigerate for up to 3 days.
- For longer storage, freeze for up to 1 month. Thaw overnight in the refrigerator before serving.
- To prevent a skin from forming, press plastic wrap directly onto the surface of the custard before refrigerating.
- For best flavor, consume within 24-48 hours of preparation.
Conclusion
These gluten-free custard cups are a testament to the fact that dietary restrictions don’t mean sacrificing flavor or indulgence. With their creamy texture and rich taste, they’re perfect for any occasion, from family dinners to elegant dinner parties.
We’d love to hear about your experience with this recipe! Did you try any variations? Share your thoughts and photos in the comments below. And don’t forget to check out our other gluten-free dessert recipes for more delicious inspiration!