
Have you ever wondered why achieving that perfect, restaurant-style crunch at home feels impossible without wheat flour? It is a question that haunts many home cooks navigating dietary restrictions. The secret isn’t just in the heat; it is in the chemistry of the coating. This recipe challenges the belief that you need gluten for texture.
We are about to unlock the secret to golden, crispy perfection that rivals any deep-fried counterpart. By using a specific blend of alternative flours and high-heat roasting, we create a meal that is satisfying and safe. Get ready to master the art of homemade gluten-free chicken tenders.
Furthermore, finding a meal that the whole family enjoys can be a chore. This recipe is the ultimate kid-approved GF lunch. It combines the comfort food appeal of chicken strips with the nutrient density of sweet potatoes. It is a win-win for taste buds and health alike.
Ingredients List
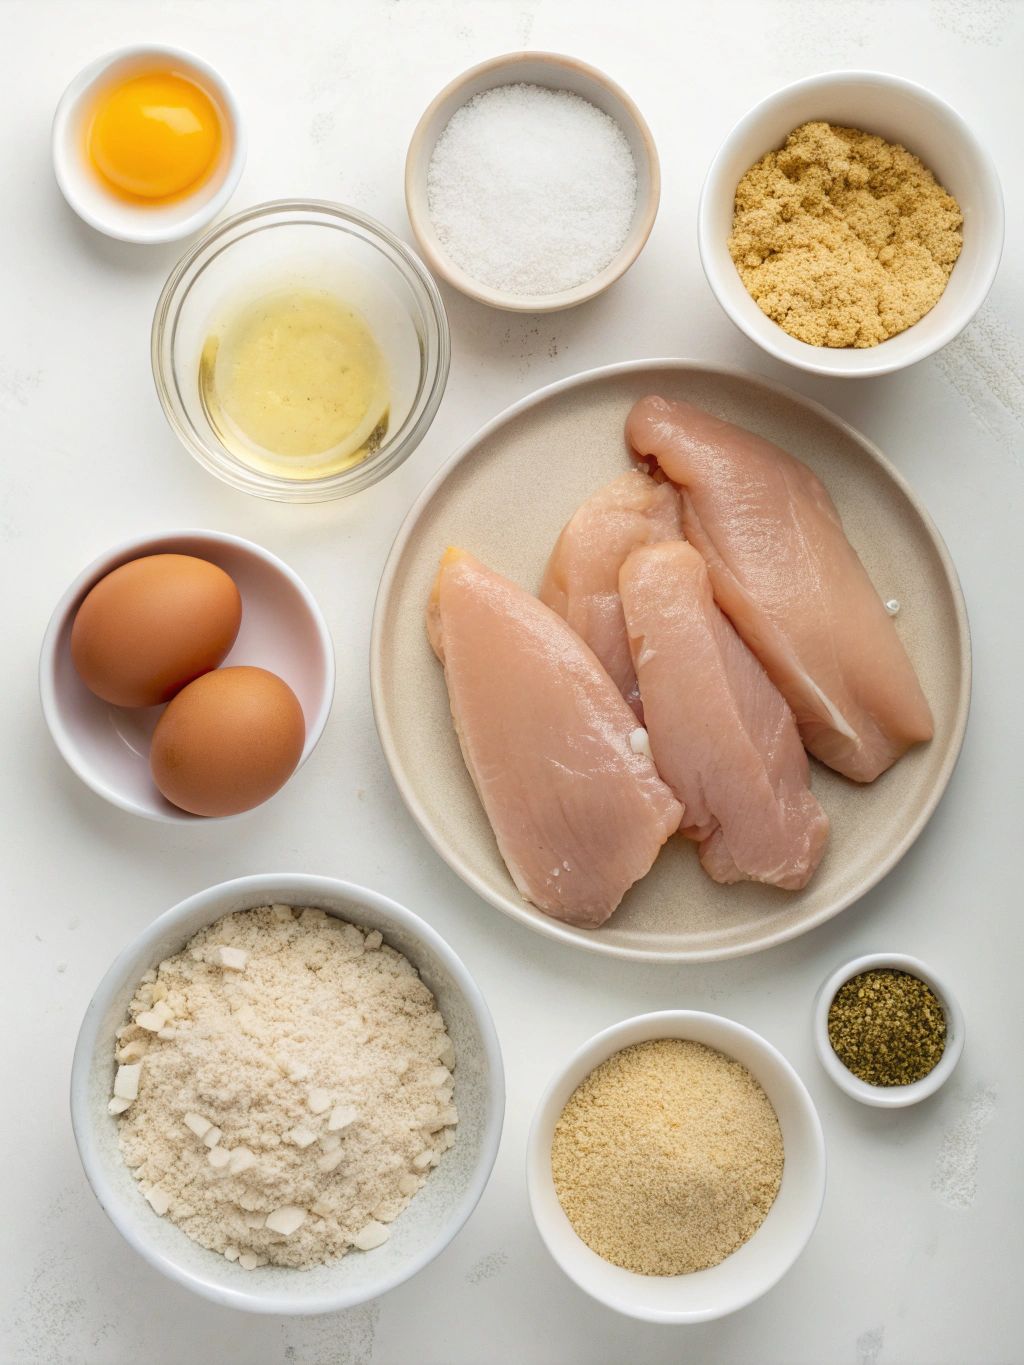
To create this culinary delight, you need high-quality ingredients. Freshness is key to flavor here. Below is everything you need to get started.
- 1 lb Chicken Tenderloins: Ensure they are trimmed of excess fat and tendons for the best texture.
- 1 cup Almond Flour: This provides a nutty flavor and excellent crunch. Substitution: Crushed GF cornflakes work for a lighter texture.
- ½ cup Tapioca Starch: This helps the coating adhere to the chicken. Substitution: Arrowroot powder is a great alternative.
- 2 Large Sweet Potatoes: Look for firm, unblemished skin. Scrub them well.
- 2 Large Eggs: Whisked thoroughly for the dredging station.
- 1 tsp Smoked Paprika: Adds a depth of flavor and beautiful color.
- ½ tsp Garlic Powder: Essential for that savory kick.
- ½ tsp Onion Powder: Complements the garlic perfectly.
- Sea Salt & Black Pepper: To taste. Don’t be shy with the seasoning.
- Avocado Oil Spray: For coating the baking sheet and food. It has a high smoke point.
Timing
Understanding the time commitment helps you plan your meal effectively. This recipe is designed for efficiency without sacrificing quality.
Prep Time: 20 minutes
Cook Time: 25 minutes
Total Time: 45 minutes
Data indicates that the average delivery time for fast food is roughly 35 to 40 minutes. By cooking this, you spend nearly the same amount of time. However, you gain significantly in nutritional value and food safety. You control the kitchen environment entirely.
Step-by-Step Instructions

Step 1: Prepare the Oven and Trays
Preheat your oven to 425°F (220°C). This high temperature is crucial. It ensures the sweet potatoes caramelize and the chicken coating crisps up quickly.
Line two large baking sheets with parchment paper. This prevents sticking and makes cleanup a breeze. Place wire racks on top of the baking sheets if you have them. This allows air to circulate under the gluten-free chicken tenders.
Step 2: Prep the Sweet Potatoes
Wash and dry the sweet potatoes thoroughly. Slice them into even strips, about ¼ inch thick. Uniformity is vital here.
If the fries are different sizes, some will burn while others remain raw. Toss the fries in a bowl with a tablespoon of oil and a pinch of salt. Spread them in a single layer on one baking sheet. Do not overcrowd them.
Step 3: Create the Dredging Station
Set up three shallow bowls. In the first, place the tapioca starch. In the second, whisk the eggs until frothy.
In the third bowl, mix the almond flour, smoked paprika, garlic powder, onion powder, salt, and pepper. This assembly line ensures a smooth coating process. Keep one hand for “wet” ingredients and one for “dry” to avoid messy fingers.
Step 4: Coat the Chicken
Pat the chicken tenderloins dry with a paper towel. Moisture is the enemy of a good crust. Dip a tenderloin into the tapioca starch first, shaking off the excess.
Next, dip it into the egg wash, ensuring it is fully coated. Finally, press it firmly into the almond flour mixture. Make sure the breading adheres to all sides. Place the chicken on the second prepared baking sheet.
Step 5: The Bake
Place the sweet potato fries on the top rack of the oven. Place the chicken tenders on the middle rack. Bake for 12 minutes.
After 12 minutes, flip the chicken tenders and toss the fries. This ensures even cooking. Return pans to the oven. Swap the rack positions if your oven has hot spots.
Step 6: Final Crisp
Bake for another 10-12 minutes. The chicken should reach an internal temperature of 165°F (74°C). The coating should be golden brown.
The fries should be tender on the inside and blistered on the outside. Let the chicken rest for 5 minutes before serving. This keeps the juices inside the meat.
Nutritional Information
This meal is a powerhouse of nutrition compared to traditional fried baskets. It balances macronutrients effectively for a sustained energy release.
Calories: Approximately 450 per serving.
Protein: 35g. High protein content aids in muscle repair and satiety.
Carbohydrates: 30g. The complex carbs from sweet potatoes provide steady energy without a sugar crash.
Fats: 22g. Primarily healthy monounsaturated fats from almond flour and avocado oil.
Fiber: 6g. Excellent for digestive health.
This profile makes it an excellent post-workout meal or a hearty lunch. You get the satisfaction of “junk food” with the profile of a health meal.
Healthier Alternatives for the Recipe
While this recipe is already nutritious, you can tweak it for different dietary goals. Flexibility is the hallmark of modern cooking.
Low-Carb Option: Swap the sweet potato fries for zucchini fries or green bean fries. This drastically reduces the carbohydrate count for keto dieters.
Nut-Free Version: If you have a nut allergy, replace the almond flour with crushed pork rinds or gluten-free panko breadcrumbs. This maintains the crunch without the allergen.
The Baked Option: This recipe is naturally a healthy baked option. However, if you own an air fryer, you can cook these in batches. Air frying often yields an even crispier result in less time.
Serving Suggestions
Presentation and accompaniments elevate this dish from a snack to a meal.


