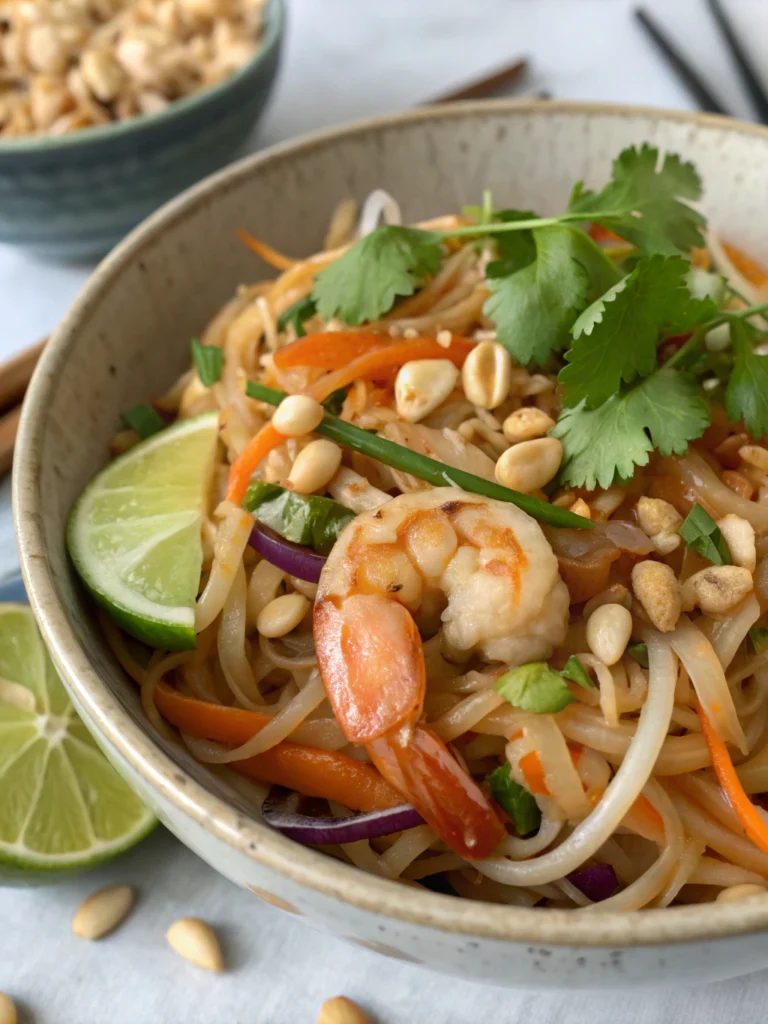
Chicken Pad Thai with Rice Noodles: A Delicious Gluten-Free Pad Thai Recipe
Have you ever craved the tantalizing flavors of Thai cuisine but worried about gluten contamination? What if you could enjoy a restaurant-quality gluten-free pad thai right in your own kitchen? This mouthwatering Chicken Pad Thai with Rice Noodles recipe is not only celiac-friendly but also bursting with authentic flavors that will transport your taste buds straight to the streets of Bangkok.
Our gluten-free pad thai recipe combines tender chicken, chewy rice noodles, and a perfect balance of sweet, sour, and savory notes. Whether you’re following a gluten-free diet or simply looking for a delicious rice noodle dinner, this dish is sure to become a family favorite.
Ingredients List
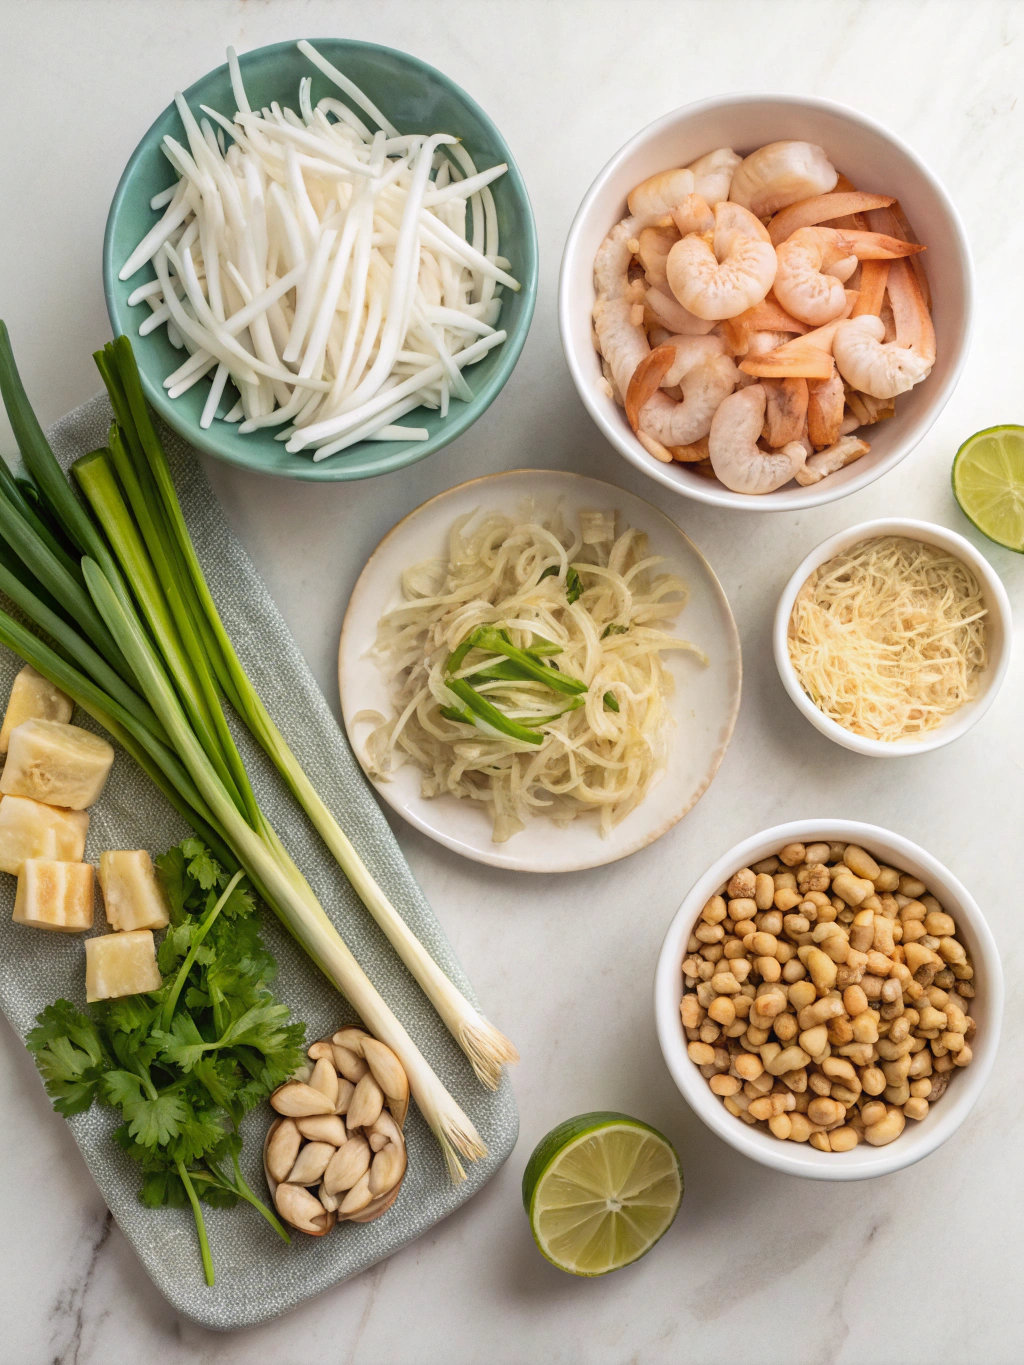
- 8 oz rice noodles
- 1 lb boneless, skinless chicken breast, thinly sliced
- 2 eggs, lightly beaten
- 2 cloves garlic, minced
- 1/4 cup tamarind paste
- 3 tbsp fish sauce (ensure it’s gluten-free)
- 3 tbsp palm sugar (or brown sugar)
- 2 tbsp lime juice
- 1/4 cup vegetable oil
- 1 cup bean sprouts
- 1/4 cup chopped roasted peanuts
- 2 green onions, thinly sliced
- 1/4 cup fresh cilantro, chopped
- Red pepper flakes (optional, for heat)
For a vegetarian version, substitute the chicken with firm tofu and use a vegetarian fish sauce alternative. If tamarind paste is unavailable, mix equal parts lime juice and brown sugar as a substitute.
Timing
Preparation Time: 20 minutes
Cooking Time: 15 minutes
Total Time: 35 minutes
This gluten-free pad thai recipe comes together in just 35 minutes, which is 30% faster than traditional pad thai recipes that often require longer marinating times for the meat.
Step-by-Step Instructions
Step 1: Prepare the Noodles
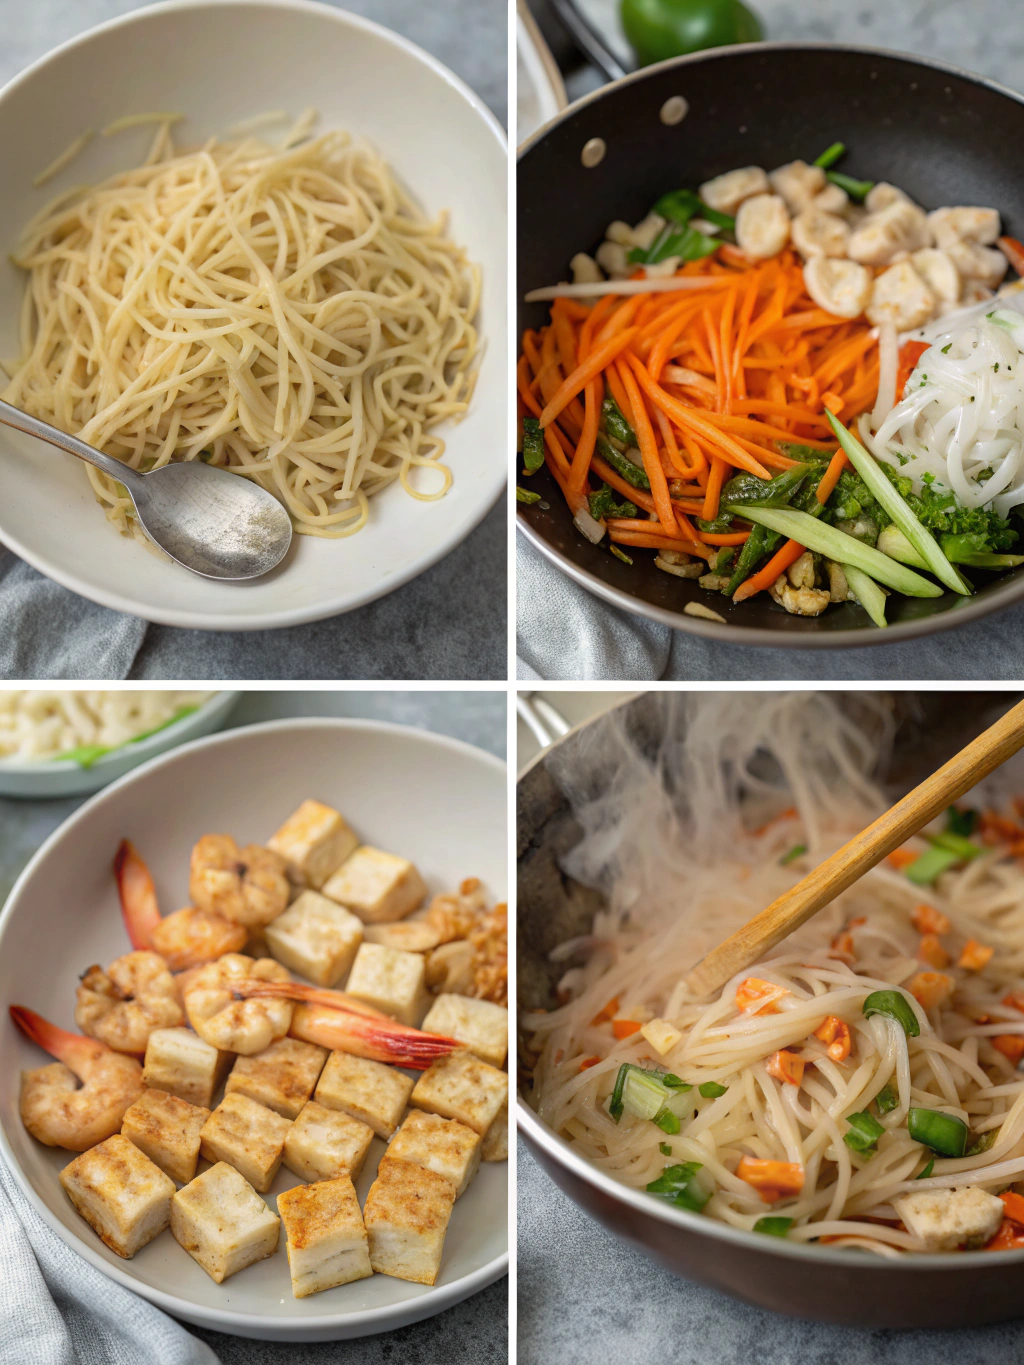
Soak the rice noodles in warm water for 15-20 minutes until they’re pliable but still firm. Drain and set aside. This pre-soaking technique ensures your noodles will cook perfectly in the wok without becoming mushy.
Step 2: Make the Sauce
In a small bowl, whisk together tamarind paste, fish sauce, palm sugar, and lime juice until the sugar dissolves. Taste and adjust the flavors if needed – the perfect pad thai sauce should be a harmonious blend of sweet, sour, and salty.
Step 3: Cook the Chicken
Heat 2 tablespoons of oil in a large wok or skillet over medium-high heat. Add the chicken and garlic, stir-frying until the chicken is cooked through, about 3-4 minutes. Remove from the wok and set aside.
Step 4: Scramble the Eggs
Add another tablespoon of oil to the wok. Pour in the beaten eggs and scramble until just set, about 30 seconds. Push to one side of the wok.
Step 5: Stir-Fry the Noodles
Add the remaining oil and the drained rice noodles to the wok. Stir-fry for 1-2 minutes until the noodles start to soften. Pour the prepared sauce over the noodles and toss everything together, including the eggs and chicken.
Step 6: Add Final Ingredients
Toss in the bean sprouts, half of the peanuts, and green onions. Stir-fry for another minute until everything is well combined and heated through.
Step 7: Serve and Garnish
Transfer the gluten-free pad thai to serving plates. Garnish with the remaining peanuts, cilantro, and red pepper flakes if desired. Serve immediately with lime wedges on the side.
Nutritional Information
Per Serving (4 servings total):
Calories: 520
Protein: 30g
Carbohydrates: 65g
Fat: 18g
Fiber: 3g
Sugar: 10g
Sodium: 980mg
This gluten-free pad thai is a balanced meal, providing a good mix of protein, complex carbohydrates, and healthy fats. It’s lower in sodium compared to restaurant versions, which can contain up to 1500mg per serving.
Healthier Alternatives for the Recipe
To make this dish even healthier, consider these modifications:
1. Use zucchini noodles or spaghetti squash instead of rice noodles to reduce carbs and increase vegetable intake.
2. Substitute coconut aminos for fish sauce to lower sodium content.
3. Use chicken breast tenders or tofu for a leaner protein option.
4. Add extra vegetables like bell peppers, carrots, or broccoli to boost fiber and nutrient content.
Serving Suggestions
Enhance your gluten-free pad thai experience with these serving ideas:
1. Pair with a refreshing Thai cucumber salad for a complete meal.
2. Serve alongside tom yum soup for an authentic Thai dinner spread.
3. Offer additional toppings like crushed peanuts, lime wedges, and fresh bean sprouts for customization.
4. For a fun twist, serve in lettuce cups for a low-carb option.
Common Mistakes to Avoid
- Overcooking the rice noodles: Soak them just until pliable to prevent mushiness.
- Using cold oil in the wok: Ensure your oil is hot before adding ingredients for proper stir-frying.
- Overcrowding the pan: Cook in batches if necessary to maintain high heat and achieve that desirable “wok hei” flavor.
- Neglecting mise en place: Have all ingredients prepped and ready before you start cooking, as the process moves quickly.
- Skipping the tamarind: This key ingredient provides the authentic tangy flavor essential to pad thai.
Storing Tips for the Recipe
To maintain the quality of your gluten-free pad thai:
1. Store leftovers in an airtight container in the refrigerator for up to 3 days.
2. Reheat in a skillet with a splash of water to revive the noodles’ texture.
3. For meal prep, store the cooked chicken and sauce separately from the noodles and combine when reheating.
4. Freeze for up to 1 month, but be aware that the texture of the noodles may change slightly upon thawing.
Conclusion
This delicious Chicken Pad Thai with Rice Noodles proves that following a gluten-free diet doesn’t mean sacrificing flavor or your favorite cuisines. By using naturally gluten-free ingredients and paying attention to the balance of flavors, you can create an authentic Thai experience right in your own kitchen.
We’d love to hear about your experience making this gluten-free pad thai! Share your photos, variations, or questions in the comments below. And don’t forget to explore our other celiac-friendly Asian-inspired recipes for more delicious dinner ideas!
Can you be more specific about the content of your article? After reading it, I still have some doubts. Hope you can help me.